For children with high or low tone in the lower extremeties, the simple joy of bike riding can be hard to come by. There are some great organizations that help with adaptive bikes for people of all ages (we have had great experiences with Ambucs). For those families that are unable to get an adaptive bike for their little boy or girl, one helpful DIY project can get your child on an existing tricycle: footholds or strap-pedals. These add-on foot holds can be made in ANY size and can fit just about any standard tricycle pedal. I say tricycle because something like this would NOT be helpful on a regular bike as the rider’s feet are strapped in, thus making removal of the foot from the pedal to brake/stop/balance impossible. So again, these are for TRICYCLES of any size. Please also remember to ALWAYS wear a protective bike helmet regardless of age/skill level/bike stability. A seat belt of some sort is highly recommended. Working with your child’s physical therapist to best devise appropriate tricycle add-ons will be very helpful!
=======
Towards the end of last school year, we had the opportunity at Colten’s EarlyOn preschool to put him on an adaptive bike. This was a hand-cycle and foot pedal tricycle. Having tons of bikes at home and wanting to encourage the pedaling motion in his legs/hips, we wanted to figure out a way to get him some pedal straps for our existing bikes so his feet could stay in place. While Colten has some strength to push with his legs, being able to keep them on the pedals seems to require more control throughout his lower extremities than he has right now. After talking with our EarlyOn physical therapist, she showed us what some families have used on their home tricycles… a custom made foot-hold that can go on any pedal. They had someone local make them a bin to share with the students, but were on their last two pairs. Knowing that I have a wonderful cousin who does amazing woodworking, I took a plethora of pictures of the original design and sent them to him. So hopefully with these pictures, you too can find someone (or DIY!) to recreate adaptive pedals for your child!
=======
Depending on what size you are making yours, your supply needs may change slightly. The pieces are fairly basic and you can hopefully figure out how to adapt sizing to your needs.
Supply list:
- Bolts, washers, wing nuts (4 of each): the bolt needs to be long enough to go through 2 layers of the wood, plus the depth of the pedal, plus a little extra (too much extra and you may risk dragging the bolt on the ground while pedaling; so wood depth x2 + pedal depth + 1/2″ maybe)
- something to drill a hole through the wood that will accommodate the bolt; these holes will need to be counter-sunk
- sturdy wood piece, approximately 1/2″-3/4″ thick: you need enough wood to make two (2) foot plates that are about the size of your child’s foot – if you have a young child that’s growing fast, make the plates a big larger so they can grow into them
- something to cut wood with
- PVC cap or tube: this is for the heel hold so you need a width large enough for the foot to sit in
- something to cut PVC with
- screws and washers (6 of each; these are for attaching the PVC heel piece)
- screwdriver
- dual-sided hook and loop (Velcro style) straps: we actually used (for something else but similar strapping need) hook and loop cable ties found in the AV section of a home improvement store; you should be able to find these types of straps in some form or another; you need enough to make 2 straps on each foot hold that will go over the shoe – extra length isn’t bad, you can always cut it
We don’t have progression photos because we did not build these ourselves. But hopefully our explanation of the pictures can help you to build a pair!

You need two foot-shaped wood cutouts. These should be about the size of your child’s foot with his/her shoe on. Remember to be generous with length if your child is young and growing quickly! (We aren’t sure what that third drilled hole is for, so let’s ignore it! It’s possible you could customize the holes specifically for your trike or multiple trikes this way. But the bolts just need to be far enough apart to fit the pedal between them.)

The holes that get drilled and counter-sunk should be far enough apart from each other that a tricycle pedal can fit between them. This allows you to slide the foothold onto the pedal. You also need a bottom rectangular piece cut from wood that will help anchor the foothold to the pedal. The bolts need to be long enough to go through both layers of wood, plus have room for the pedal to slide in, plus leave a little extra length to loosen the bottom rectangle piece away from the pedal a little to slide it on/off easily.

The PVC heel support will keep the foot from sliding out or side to side too much. It should be secured on the back and both sides. I would not advise making it too high as that could impede the pedaling motion that legs typically have as they cycle around.
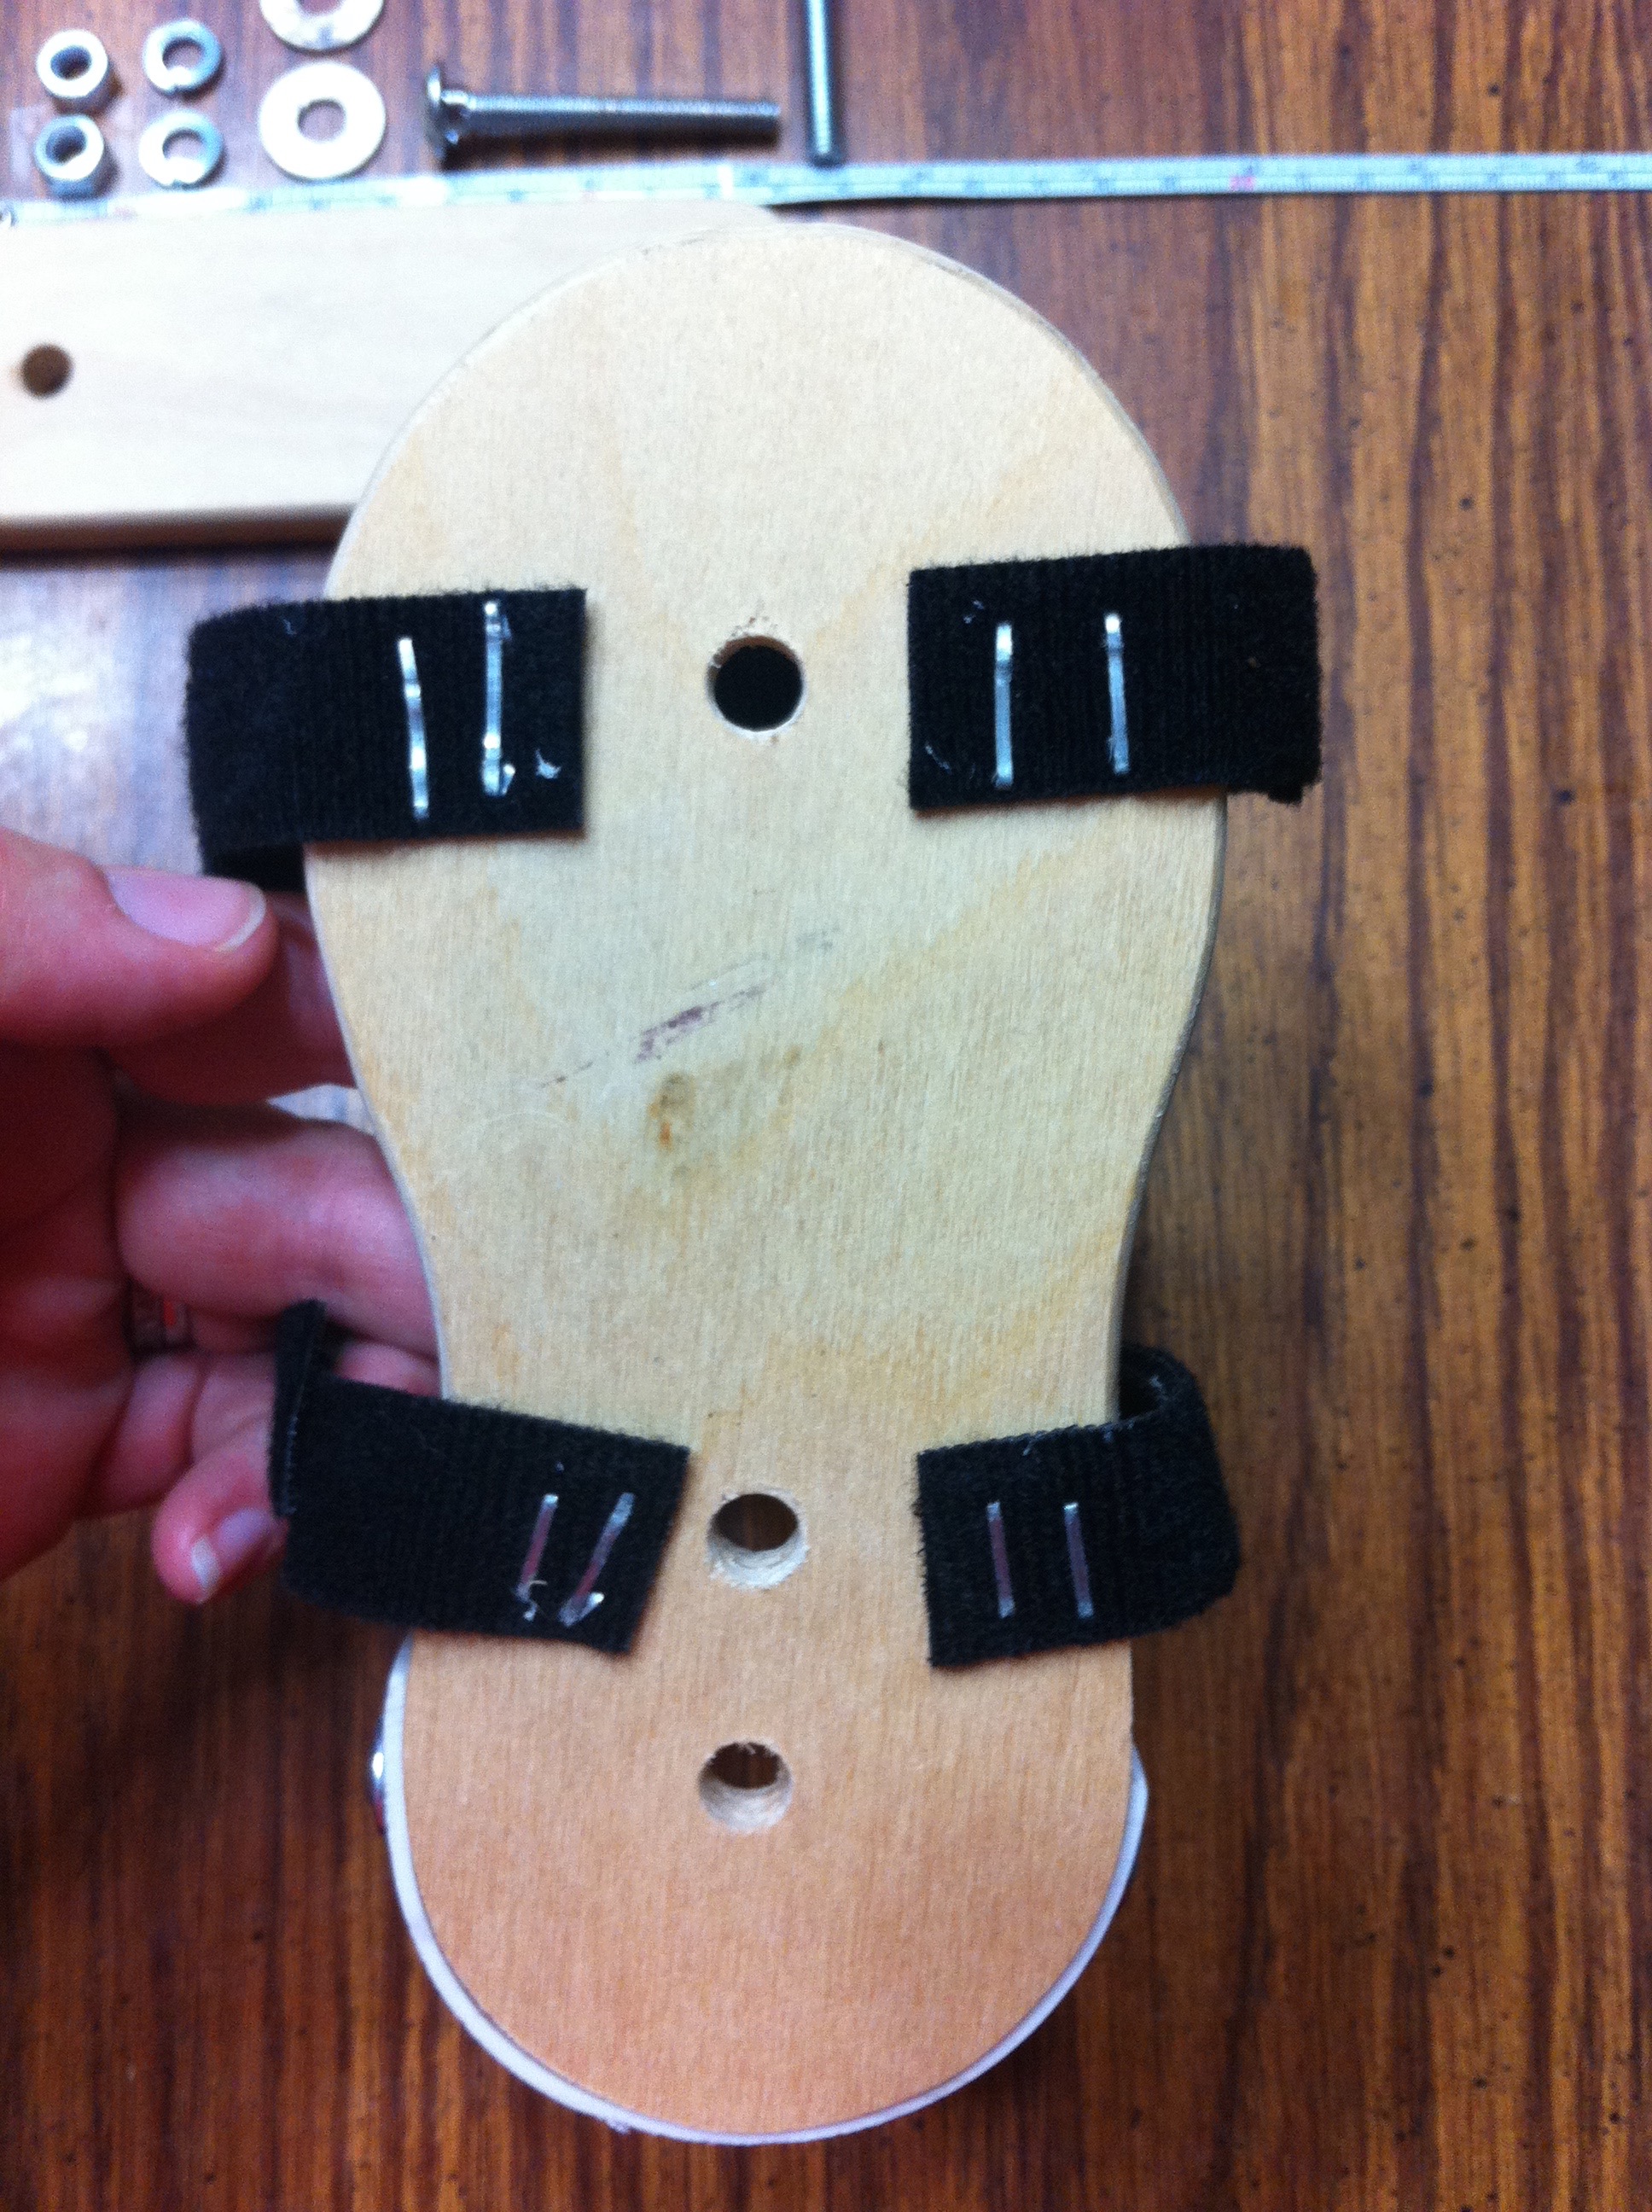
 The hook-and-loop straps can get stapled to the bottom of the foot plate. They should be long enough to come up over the child’s shoe and cross over each other to stay secure. Again, these are a type of dual-sided hook and loop in that they stick to each other either way. They’re a pretty durable type of strap/fabric/material – and easy to quickly strap up.

Here’s a standard tricycle pedal and our finished foothold!
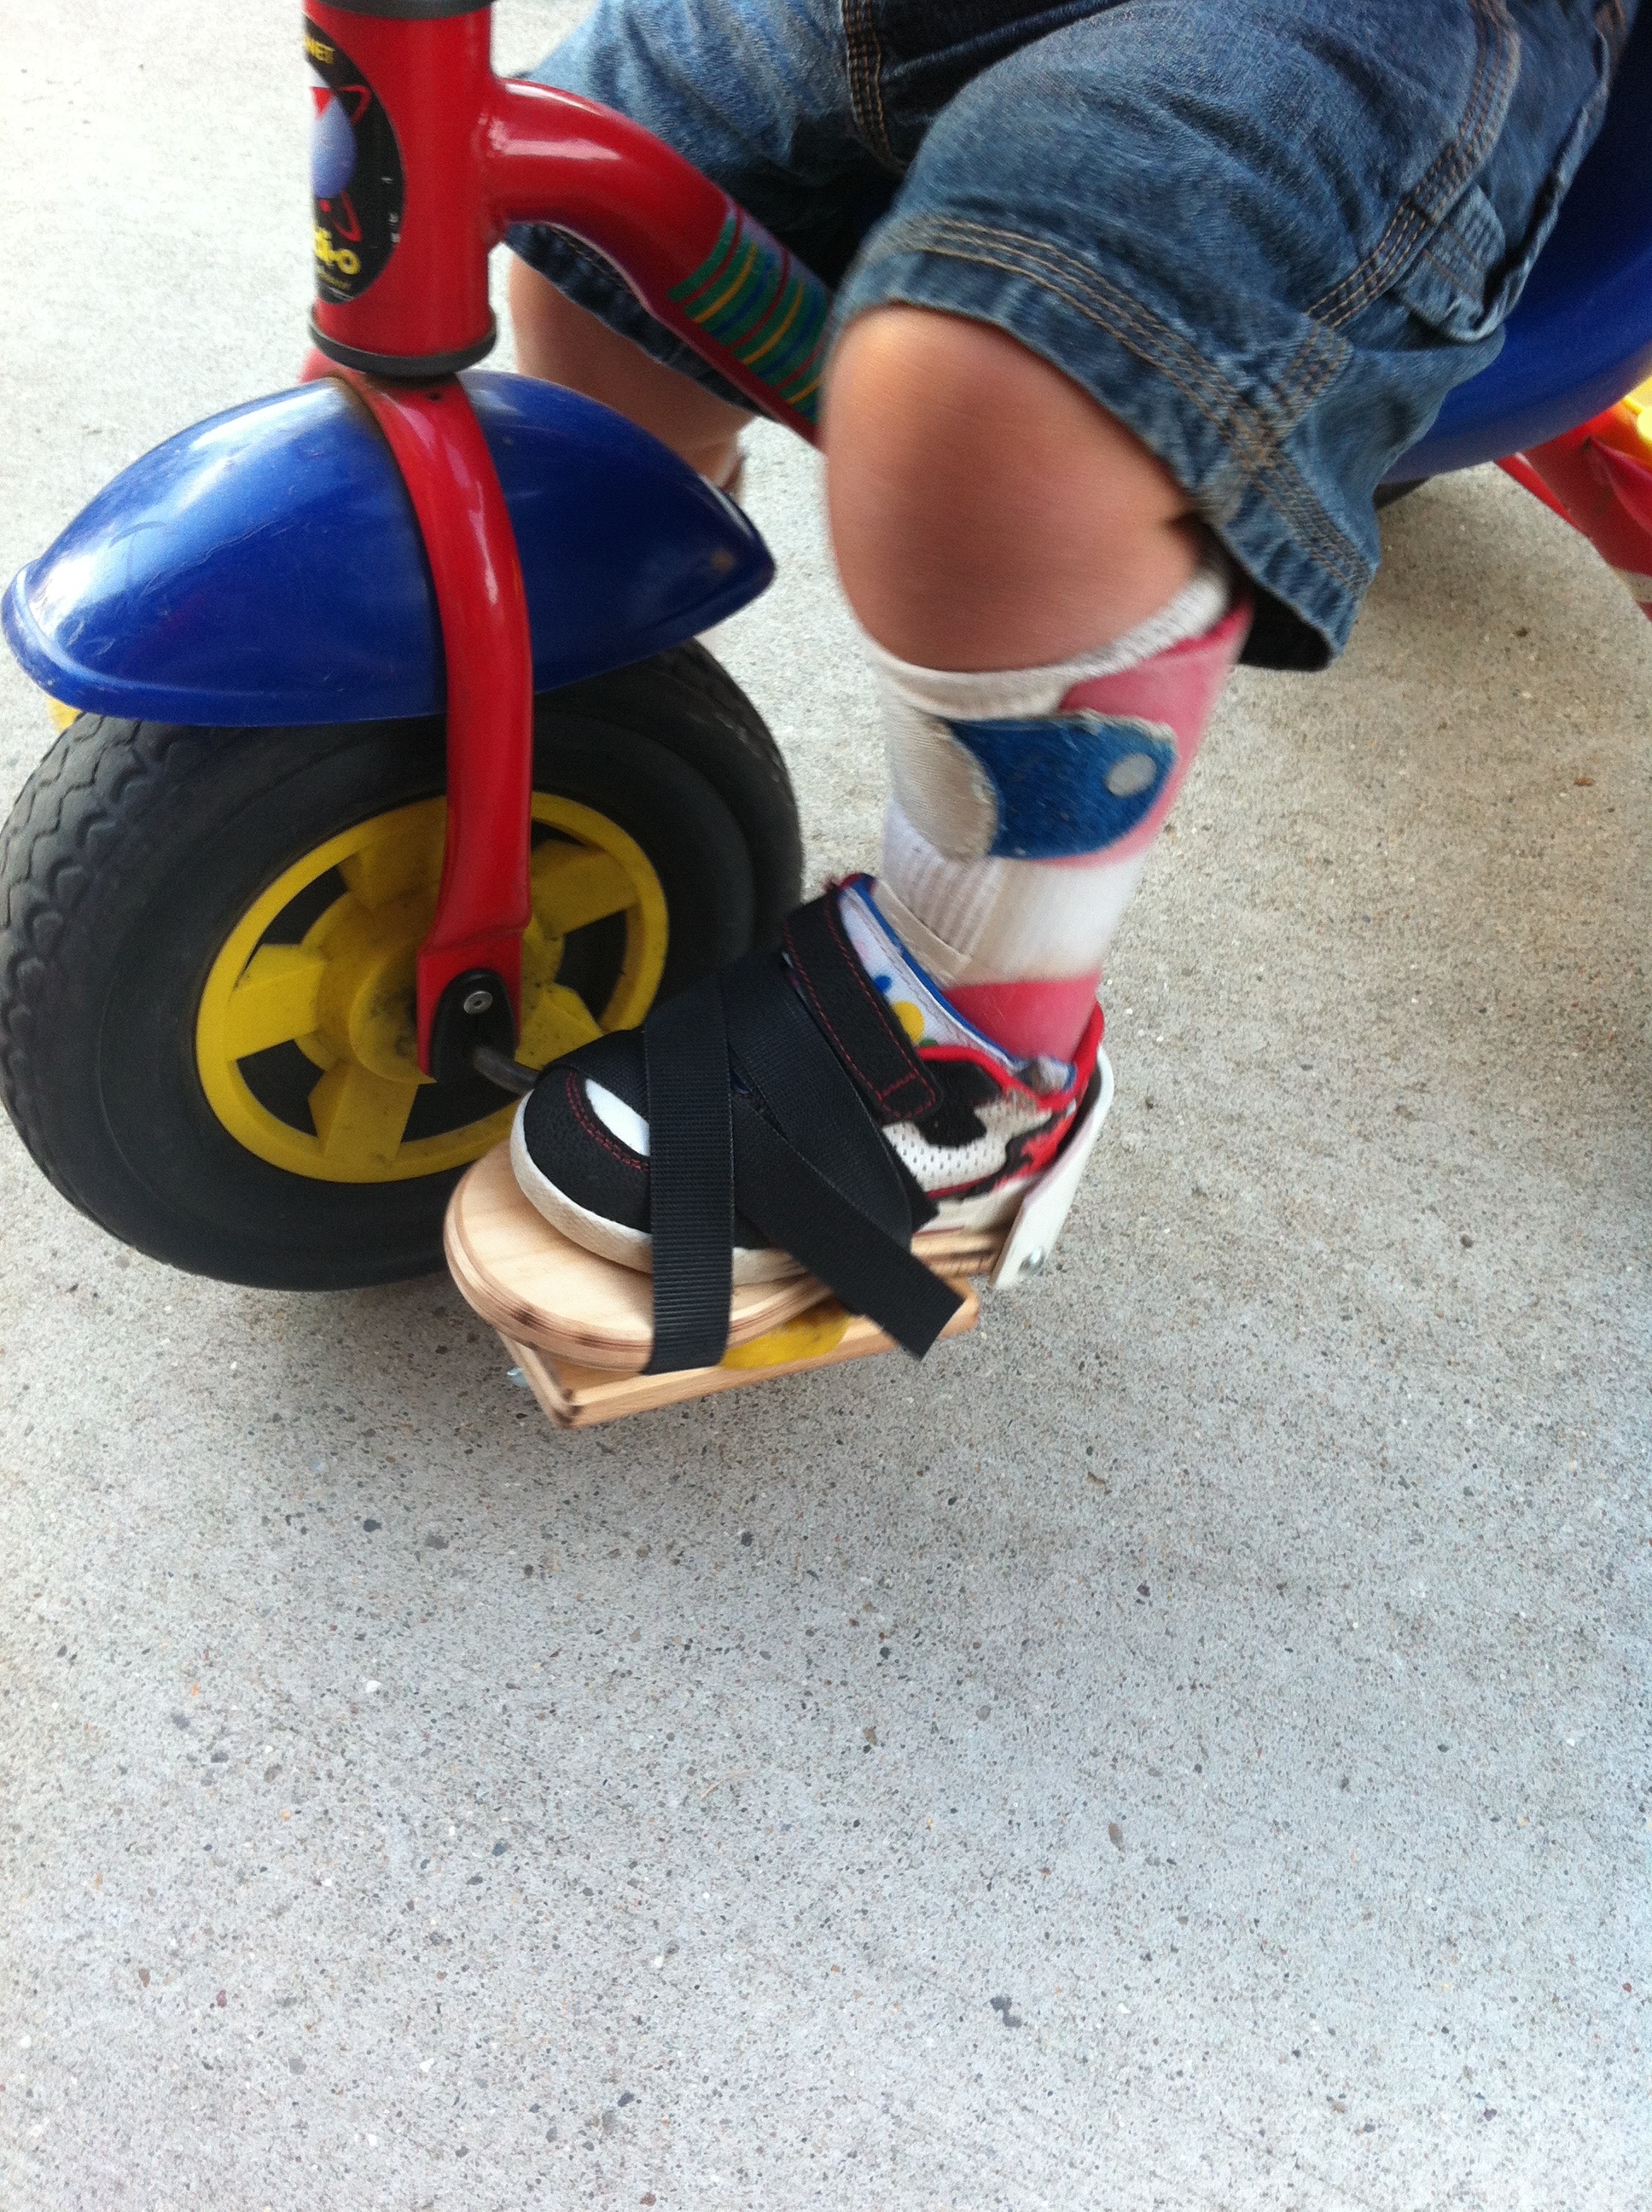
The foothold slides onto the pedal – again, the pedal goes between the foot plate and rectangular piece below. TIGHTEN the bolts with the wing nut so the two wooden pieces are clamped tightly onto the pedal. Then place the child on the tricycle and strap his/her feet into the pedals. (We actually had the footholds on the wrong sides, right/left, and switched it after this, but it might not matter if you don’t make the foot plate too foot-shaped and instead make it more rectangular or oval or basic peanut shaped.)
We did not get much use out of our pedals last year. Our son was unable to propel the bike with his legs; we just pushed him around. Without a handle on this tricycle, it got old, fast 🙂 This year, after he had some time on a hand-cycle with foot pedal tricycle, he asked to ride our tricycle at home. I put the footholds on and told him that this bike didn’t have hand pedals like the other bikes he rode – that he would need to use his legs. Expecting him to basically sit there and not go anywhere, imagine my surprise when he did this… [ watch video on YouTube ]
Good luck with your pedals, and happy and safe riding!


Hello — I am a pediatric PT and share your blog often with parents. I was curious if you had a PDF version that would look nicer when printed than printing from the blog directly. Thank you!
Thank you for letting us know Emily – we are glad our experiences can be a support for other families and that you’re finding the information useful – that was the intent all along and it’s wonderful to hear that it’s being used this way! I’m looking into adding a PDF print option to the site right now…. stay tuned.
Hi Kate. I would really love these for my daughter but I can’t build a thing! Any chance I could buy some? Thanks
Emily, if you’re interested in a PDF version, please email me at kjudd21 at mac dot com and I can send you what I have that might help.
Can I pay someone to make these for my daughter!?
I realize this is several years old, but what did you use for and how did you attach the cable that keeps the adaptive pedals upright?
Hi Andrea! Not sure what cable you’re referring to… the adaptive foot piece has a top wooden “foot” and a bottom wooden “base” and the bike pedal slides between the two. Those boards are connected by the very long screws you see in the pictures. Once a kiddos foot is in the adaptive pedal, it should stay upright. But when I took his feet out, the adaptive pedals were top heavy and it would fall upside down. But since he wasn’t using it then, it didn’t matter so much. Let me know if you have more questions. Happy to weigh in more!
Pingback: Choosing Pedal Straps with Heel Support for Kids - Tips